Monday, July 29, 2013

Reclaiming the Bedroom Lamps

While redecorating my master bedroom, I repainted my dresser. I loved my lamps but they really didn't match my new décor and colors. Not the shape, but the color. So I decided to spray them. Took me all of 10 minutes. I saved at least $200 by not replacing them, and they look great on my painted furniture. Before:


As you can see these are absolutely beautiful but the gold, patina color did not match. Here is the after:


 See how great they look on the painted furniture!

I used
 
 From Home Depot. Rustoleum Oil Rubbed Bronze. Only $6.76 a can. It already has the primer included. I have also used this on my curtain rods and chandeliers and the color is fabulous.
 
Let me know if you have reclaimed your lamps.
 
Happy Reclaiming!

Thursday, July 25, 2013

Reclaiming the Used Dresser into a TV Stand

While setting up my daughters apartment, we wanted a TV stand. We needed the storage but also the punch of color.


We started heading to used furniture stores in search of the perfect dresser. We got lucky and found it at the first store we stopped at for $50. It was a steal. All wood. No mirror but we didn't need one.


I loved the detail, but when we painted it the detailing just jumped out. I removed the drawer pulls, spackled the holes, and sanded. I didn't sand the furniture. I just used Behr paint with primer in satin so there is no need to sand. If you are planning to distress, I would use chalk paint. See my post Chalk Paint Recipe and Instructions. We left it plain so I just used straight paint. I always paint furniture with a sponge brush, not because it is cheap, but because it goes on smoother and doesn't leave brush strokes.
 
I drilled holes for new knobs. I love the large glass knobs at Home Depot Glass Knobs. They are $6 each and with 10, they actually cost more than the dresser, but it was worth it. I then drilled holes in the back and add extension cords that fed into certain drawers. One drawer to charge Iphone and Kindle. One drawer for the laptop. And behind the doors, where I removed the drawers and installed the Satellite and DVR.
 
BTW, the candle sticks and the plant came from TJ Maxx. You really need to go to TJ Maxx or Home Goods to get accessories for reasonable prices. I love these stores and try to stop in often.
 
I would love to see your dressers to TV stands!
 
Happy Reclaiming!

Wednesday, July 24, 2013

Furnishing a Daughter's Apartment: Flea Market Finds!

I recently helped my daughter furnish her new apartment. We started with nothing but after looking at flea markets and used furniture stores, we were able to furnish her dining room with a modern but classy look.


We loved it! Its classy, sophisticated, and chic. All done on a budget. Here are the components:

First the table. We found this at a flea market with nasty parson chairs. It was absolutely gorgeous! I asked the seller about buying just the table without the chairs. If he said no, I was ready to pick up the table and throw the chairs in the dumpster. The set was $150 and he sold me the table for $100! This is probably the best steal I'll ever see. The table has a leaf and comes with a custom table pad.


It has great details as you can see. It would have been $2000 at an antique dealer. And still well worth that.

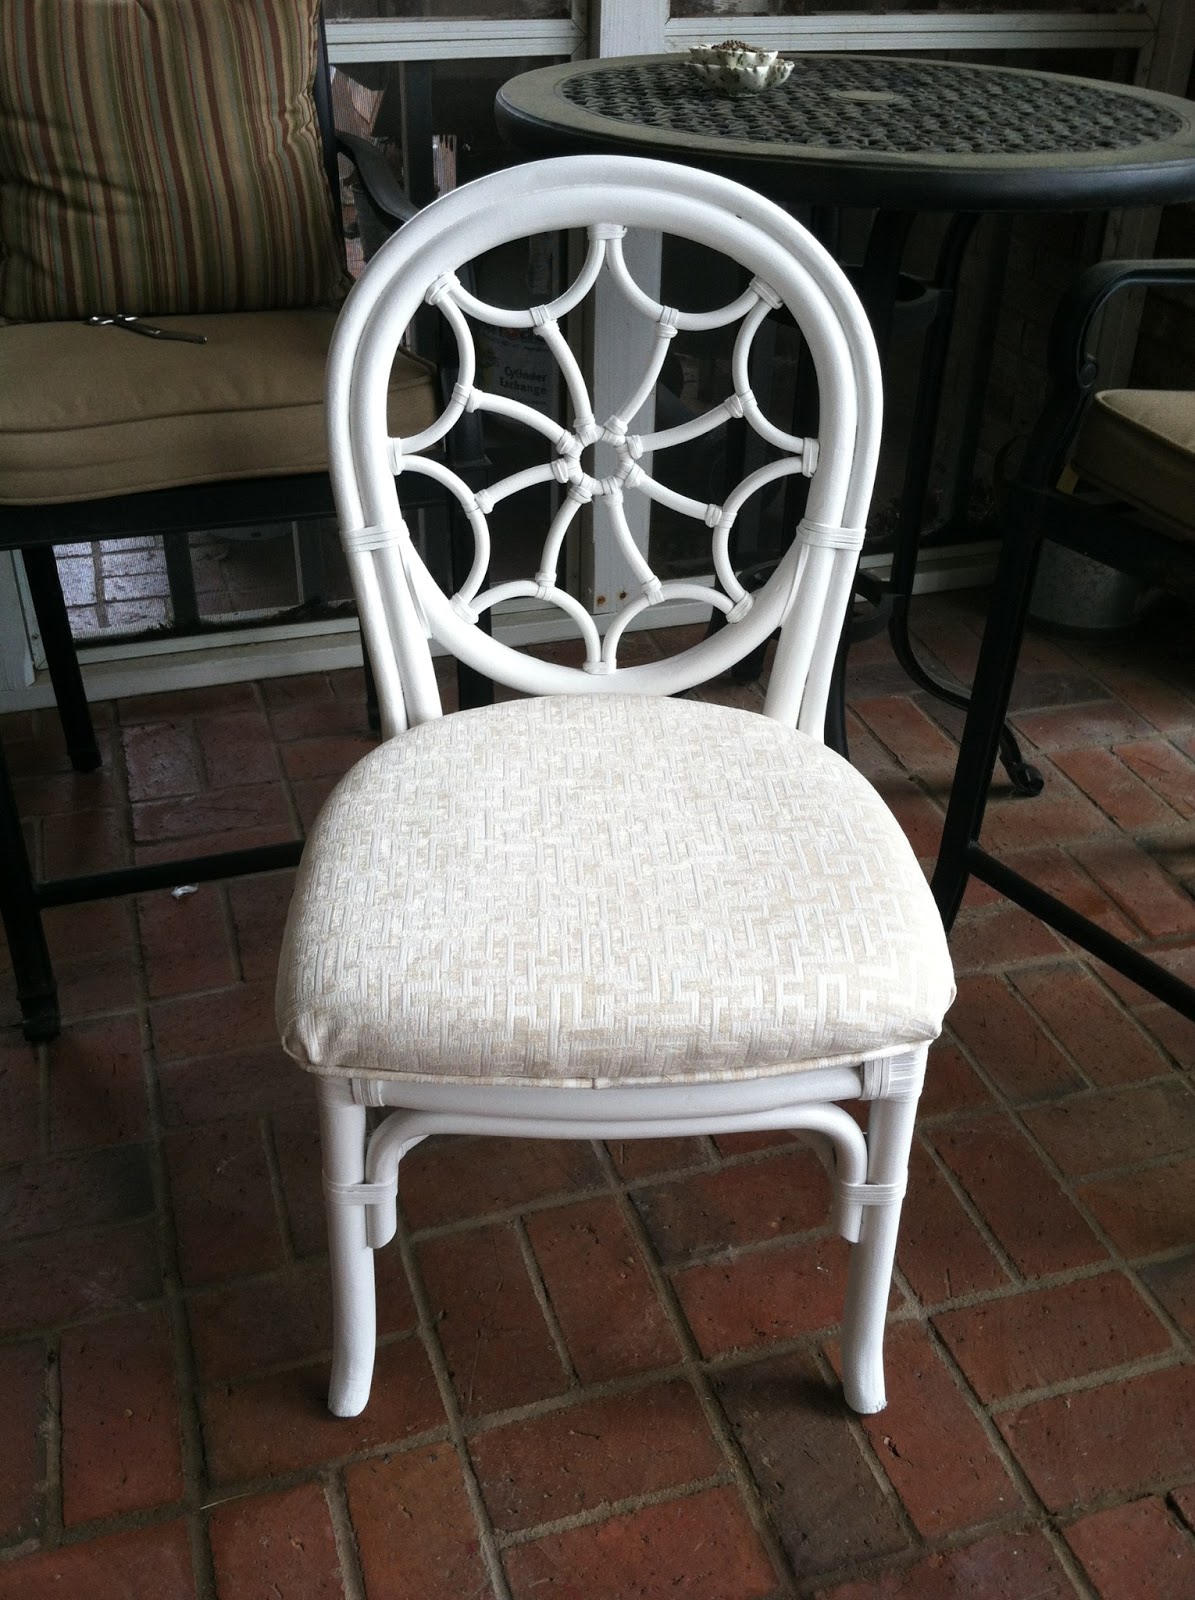
Then I went to a used furniture store here in Cordele. The owner goes to sales when a hotel changes furniture and found these spider back chairs. Yes, the seat cover covered with plastic. These were $20 each.


I bought 4 ($100 dollars) and brought them home. We then spray painted them.


I recovered the seat with fabric I already had left over from recovering my dining room chairs. I found this at www.lsfabric.com.


Table top. We found the white plates at Wal-Mart, flower plates at www.anthropologie.com, the silverware at www.target.com, the place mats at www.beallsoutlet.com, glasses at www.pier1.com, and the vases at www. TJMaxx.com.

The rug at www.rugsusa.com and the painting at www.overstock.com. All together we have about $600 invested in total.

BTW the napkins were a wedding gift of mine 29 years ago. Becca loved it!!!!!

Happy Reclaiming!

Monday, July 22, 2013

Reclaiming the Bed Risers

I love an elevated bed. I think it looks more elegant but the biggest reason is storage. This is where I store luggage. It's so easy to reach under the bed, grab the luggage, throw it on the bed and start packing.

I don't like bed risers. They are so ugly, stick out (where we all stump our toes), and look cheap. I recently bought an new bed frame. It was standard height and we had an elevated rice bed before and we felt we were laying on the floor. Even my husband said he felt he was in the wrong house.

I bought the standard bed risers from Wal-Mart.


I hated the look and the way they were visible and stuck out under the bed skirt. It cheapened the look I was going for. I got online to find something else but couldn't find anything that looked like a furniture leg.

I went to Home Depot. The furniture feet in their millwork section were not tall enough. I went to the deck section and found a post topper that was the right height. If I turned it upside down, it was perfect. One hitch: How do I make it work. Well I presented the problem to my husband. As always, if it can be done, he will find a way. And he did. I am posting how to make your bed risers look like furniture legs for as little as $15.

First we started with the feet that came with the frame:


Then he added a piece of wood on the inside and drilled a hole in it to match the screw on the deck post topper:


This is the deck post topper:


You can find it at Home Depot http://www.homedepot.com/p/WeatherShield-4-in-x-4-in-Pressure-Treated-Unfinished-Pine-Ball-Top-Finial-102615/100051746#.Ue29rLzD-Cg for $3.27 each.

We screwed them in an thought it was still not stable enough so he screwed in 4 more screws from the top:


 Then, I painted them to match my other furniture and installed them:


Now look at my finished product:


Exactly what I wanted. I am finishing the bedroom and will post more pictures later.

Happy Reclaiming!

Friday, July 19, 2013

Reclaiming the 1950's Vanity with Chalk Paint

At a flea market, I came across this 1950's vanity. What is so unique about it is the bench is still intact. We find these everywhere but few still have the seat. My friend had just bought a new house and needed a piece for her 12 year old daughter's room. I sent her a picture and she wanted me to pick it up for just $100. It was in great shape. I painted it with chalk paint which I made (so recipe below), distressed it with sand paper and sealed with wax. After a year, she still has so many people be in awe of the piece. I love it.

After picture:


Before picture:

 
This was just the piece for her room. I love the fabric! Her daughter picked it out after I took her to Atlanta to Forsyth Fabrics and Lewis and Sharon Textiles. We had a blast that day. She picked out all her fabrics and helped me do everything from the painting, sanding and sewing. I will soon post pictures of her entire room. It looks just like a tween room.
 
Chalk paint recipe:
 
2 cups paint (I use Behr with primer in eggshell from Home Depot)
1/3 cup Plaster of Paris
2 Tbsp water
 
Mix well and apply with sponge brush. It may take a few coats but sanding is much easier and it sticks so well that I don't ever sand before application regardless of the original finish. I have tried different brushes but I feel the cheap sponge brush is the best.
 
You can glaze it at this point if you like.
 
Seal with Paste wax from minwax found in the stain section at Home Depot.
 
I will be posting other furniture reclaims I've done over the past year. I would love to see your pictures too.
 
Happy Reclaiming!

Thursday, July 18, 2013

Mom's Hand Embroidered Dish Towels

I found my Mom's dish towels. She embroidered these when she was a teenager in the 1940s and put them in her hope chest (that's another blog). I washed and starched them and then framed them. I put them in my laundry room. I love them and smile every time I enter the room.


They also help me hide the fuse boxes. Hope you find a treasured heirloom and please share your pictures.

Wednesday, July 17, 2013

Estate Sale

Estate Sale: It rolls off the tongue a lot easier than yard sale. It also brings in a completely different set of customers than a yard sale. I had things left of my Mom's, Thomas' mother, and our things.

Photo: Estate Sale started good. We had to leave before we got blocked in. Thank you Lynne Kolbie Brown.
Photo

Photo: Distractions
https://www.blogger.com/blogger.g?blogID=2648909703117200280#editor/target=post;postID=8536559998551227241;onPublishedMenu=allposts;onClosedMenu=allposts;postNum=0;src=postname

We have completed the estate sale. It was a huge success but I still have a lot of things left. I had many options on what to do with these things.

1. Have auction company come pick up what is left and sale it at a commission.

2. Donate to charity.

3. Yard Sale.

Well I have decided to have a yard sale. Since it is July and it is getting hotter, I decided to wait until fall. That will give me time to continue to clean out my house and add to it. Since it is so hot, it is easier to stay inside and get the cleaning done. I have already cleaned out my utility room, which is very large, and have already added several boxes full. I am pricing as I pack to make the yard sale much easier.

It was so emotional to go through this process, but Lynne Brown was so easy to work with. She had no emotional attachment to anything. It would have taken me years to accomplish what she did in one month.

Since it is over, I am starting back on my bedroom and I have some great things going and I can't wait to share these over the next few weeks.