Wednesday, September 11, 2013

Reclaiming the Workshop

We have not finished the workshop. We started 2 years ago but still have more things to do. The shop seems to be one area that we have dumped things for years. But I have a vision and we will get there. We really love being in the workshop during the fall. We have put a TV in there and being college football freaks, this is our favorite place to be during football season. We are also purging and organizing as we go. We stopped last year and decided to work on the garage. We had the estate sale and cleaned out the garage and now we are going back to the shop. They both go hand in hand. There are things that we use (gardening, painting, tools) that go in one place or the other. So working on both is slow but so worth it. Since college football is starting back up, we will be heading back into the workshop.

Today a friend told me that her husband and she are starting to work on her husband's workshop and wanted some ideas. So I decided to post some pictures we have taken as we started to work on ours.


 This is the before picture of the right room. The workshop has 2 rooms and we have only finished the right room. It was a mixture of garden tools, Christmas decorations, painting supplies, plumbing supplies, etc. You get the picture. It had cheap paneled walls and a drop down ceiling. All were bowing and falling apart. This workshop was built about 25 years ago.


The ceiling was insulated with 6 inch Styrofoam. We removed the ceiling and the walls and got down to the studs. I will say I was knee deep in dead varmits and rat poop. Not a good place to be in. But we all feel this way from time to time. (LOL)


Here is the cleaned up picture.


Then we walled it in with OSB from Home Depot. I spackled it and painted it light gray.

 
 We're still working. I painted the concrete floor a darker gray and bought Husky Storage which looks great, is durable and lockable.
 

Then I painted the trim white, installed a frig and TV for the games.


And what man cave can be without Farrah!

Happy Reclaiming!

Sunday, September 8, 2013

Baby Shower

As an empty nester, I get to see not only my daughters grow up, but also their friends. Many have married and now are have babies. Here is a recent baby shower we hosted for Michelle. I am so proud of my daughters and their friends. They know how to host a party.


Caitlin's (the baby) monogram on cupcakes.


Baby book. The invitation is placed in the frame and greets the guests.


Food table.


The food. Oreo balls in pink icing. Swirls. Cup cakes. Cheese sticks. Ice cream bar. Water and Pink Lemonade.


Drinks in mason jars with pretty striped straws. (These are the same jars we used at Genie's wedding. We just keep using them.)


Chalk board.

Tiny Fingers, Tiny Toes.
Little Itty Bitty Bows.
Dresses, Ribbons, And Hair to Curl.
We're Tickled Pink
She's Having A Girl.


Close up of the cup cakes.

We're still waiting on the baby should be any time now. Livvey will get a new playmate. BTW this is at Genie's house.


Monday, September 2, 2013

Reclaiming the Spice Cabinet

My spice cabinet was soooo bad, I will not post a before picture. You know, we all have one.

Having an empty nest also means grandchildren and baby food jars. I found that Beechnut Baby Food was cheaper than the others. I saved the jars believing I could find something to do with them. I recycle everything in my house and always try to think of another way to reuse things.

I am so proud of my spice cabinet now that I am including a picture. Now Thomas can find what he needs while he's cooking. (I am not the cook in the house!)


I put them on lazy Susan's and alphabetized them. I love it!


Here is a before and after. I love the G, it gives it the Graves touch!

I used Avery 22814 Labels that I found at my local Wal-Mart.


Then I went to Avery's web site and used one their templates and my ink jet printer.

I painted the lids with Rustoleum Titanium that I found at my local Home Depot.


Happy Reclaiming!

Thursday, August 29, 2013

My Mother's Memories in my Sewing Area

As I am cleaning out my sewing area and reorganizing, I wanted to decorate my sewing area. I found my mother's first sewing basket and wooden thread spools while going through her things before the estate sale.


I love sitting at my sewing machine and looking at her sewing items. It feels like she is right here with me!

Happy Reclaiming!

Saturday, August 24, 2013

Reclaiming Furniture Workshop

I will be doing a furniture painting workshop for the Crisp Area Arts Alliance this fall. We are planning a Saturday class. I still do not have a definite date but Miriam and I are working out the details. I will be posting pictures for inspiration.

I just wanted to give anyone who is interested some notice. This is will give you some time to locate a piece. I recommend any thing that is solid wood. Unless it is has real wood veneer on solid wood. I have done this piece and it came out great.

Look in your attic, your mother's or grandmother's house. Go to estate or yard sales. Go to Brady's and Bush's here in Cordele. I have found some great pieces there.

You will be responsible to bring and remove your piece on the day of the workshop so I would like for you to bring a small manageable piece such as end tables, small chests, etc. I will be teaching you everything you will need to know to go home and do bigger pieces.

Here is a changing table that Genie found for Livvey's room. It is a large chest but this is probably the biggest piece that we can accomplish in a day.


We found this "Ethan Allen" piece (yes it really was Ethan Allen) at a flea market in Douglas GA. The downtown there has several markets side by side that are also a great source for shopping for pieces.

If you want to change knobs, please let me know ahead of time. I will need you to do a few things before the class.

I will also try to do a piece during the workshop as well.

I am sooooo stinking excited!!!

Happy Reclaiming!

Thursday, August 22, 2013

Not Just Your Mothers Bedside Table!

When repurposing the guest bedroom into the grandchildren nursery, I wanted a bedside table. I looked at mirrored furniture but it wasn't quite right. I saw my mother's bedside table and got an idea. You can view the nursery at Nursery.

I painted it with silver paint. It gave me the look with out the $500 price for only $12.


Here's a close up.


I used these paints.

You can find these at Home Depot. For $5.48 each.

I painted the furniture in Polished Silver and the hardware in Thundercloud. The Precious Moments firgurine is a gift from my parents: Adoption, because I was adopted. I love it and so appropriate for the nursery. I found the frame and the lamp at TJMaxx.

I saved $488. More money for retirement!

Happy Reclaiming!

Sunday, August 11, 2013

Reclaiming the 1960s Side Table

While furnishing Becca's apartment, we went to every flea market and used furniture store in South Georgia. I came across this 1960s side table. We had them when we were little, our grandmother or mother probably still has one or we have seen them at garage sales or estate sales. What I love about older furniture is that it is all wood, well made and will last!

Before picture after I brought it home. BTW I paid $28 dollars for it.


I added light blue paint for $4, distressed it and waxed it. Here it is on my porch after I finished it.


Here it is in her apartment.
 Isn't it so cute!

I love it!


Not bad for $32. I have an all wood, well made and cute side table.

Thursday, August 8, 2013

Reclaiming the Master Bedroom Furniture (How I saved over $3000)

I am currently redecorating my master bedroom. Like all empty nesters, retirement is right around the corner so cost savings is huge. I wanted new bedroom furniture and had picked out Paula Deen furniture.


I loved these pieces at $1630 each, that's $3260 for the set.

I had bought my furniture in late 80s or early 90s. We all know it. The rice bed set.


These are in great shape but out dated. Here is my after:


You will notice I added furniture legs I bought at Home Depot. Here is a picture of painting them:


I put them on a cardboard box and it was a lot easier.

They came with these screws already inserted (the ones on the left) and we exchanged them for the ones on the right to get a good buttress with the legs and the furniture.


I painted it with home made chalk paint. $3260 minus $150 supplies = $3110 savings! Hello IRA!!!

Happy Reclaiming!

Monday, July 29, 2013

Reclaiming the Bedroom Lamps

While redecorating my master bedroom, I repainted my dresser. I loved my lamps but they really didn't match my new décor and colors. Not the shape, but the color. So I decided to spray them. Took me all of 10 minutes. I saved at least $200 by not replacing them, and they look great on my painted furniture. Before:


As you can see these are absolutely beautiful but the gold, patina color did not match. Here is the after:


 See how great they look on the painted furniture!

I used
 
 From Home Depot. Rustoleum Oil Rubbed Bronze. Only $6.76 a can. It already has the primer included. I have also used this on my curtain rods and chandeliers and the color is fabulous.
 
Let me know if you have reclaimed your lamps.
 
Happy Reclaiming!

Thursday, July 25, 2013

Reclaiming the Used Dresser into a TV Stand

While setting up my daughters apartment, we wanted a TV stand. We needed the storage but also the punch of color.


We started heading to used furniture stores in search of the perfect dresser. We got lucky and found it at the first store we stopped at for $50. It was a steal. All wood. No mirror but we didn't need one.


I loved the detail, but when we painted it the detailing just jumped out. I removed the drawer pulls, spackled the holes, and sanded. I didn't sand the furniture. I just used Behr paint with primer in satin so there is no need to sand. If you are planning to distress, I would use chalk paint. See my post Chalk Paint Recipe and Instructions. We left it plain so I just used straight paint. I always paint furniture with a sponge brush, not because it is cheap, but because it goes on smoother and doesn't leave brush strokes.
 
I drilled holes for new knobs. I love the large glass knobs at Home Depot Glass Knobs. They are $6 each and with 10, they actually cost more than the dresser, but it was worth it. I then drilled holes in the back and add extension cords that fed into certain drawers. One drawer to charge Iphone and Kindle. One drawer for the laptop. And behind the doors, where I removed the drawers and installed the Satellite and DVR.
 
BTW, the candle sticks and the plant came from TJ Maxx. You really need to go to TJ Maxx or Home Goods to get accessories for reasonable prices. I love these stores and try to stop in often.
 
I would love to see your dressers to TV stands!
 
Happy Reclaiming!

Wednesday, July 24, 2013

Furnishing a Daughter's Apartment: Flea Market Finds!

I recently helped my daughter furnish her new apartment. We started with nothing but after looking at flea markets and used furniture stores, we were able to furnish her dining room with a modern but classy look.


We loved it! Its classy, sophisticated, and chic. All done on a budget. Here are the components:

First the table. We found this at a flea market with nasty parson chairs. It was absolutely gorgeous! I asked the seller about buying just the table without the chairs. If he said no, I was ready to pick up the table and throw the chairs in the dumpster. The set was $150 and he sold me the table for $100! This is probably the best steal I'll ever see. The table has a leaf and comes with a custom table pad.


It has great details as you can see. It would have been $2000 at an antique dealer. And still well worth that.

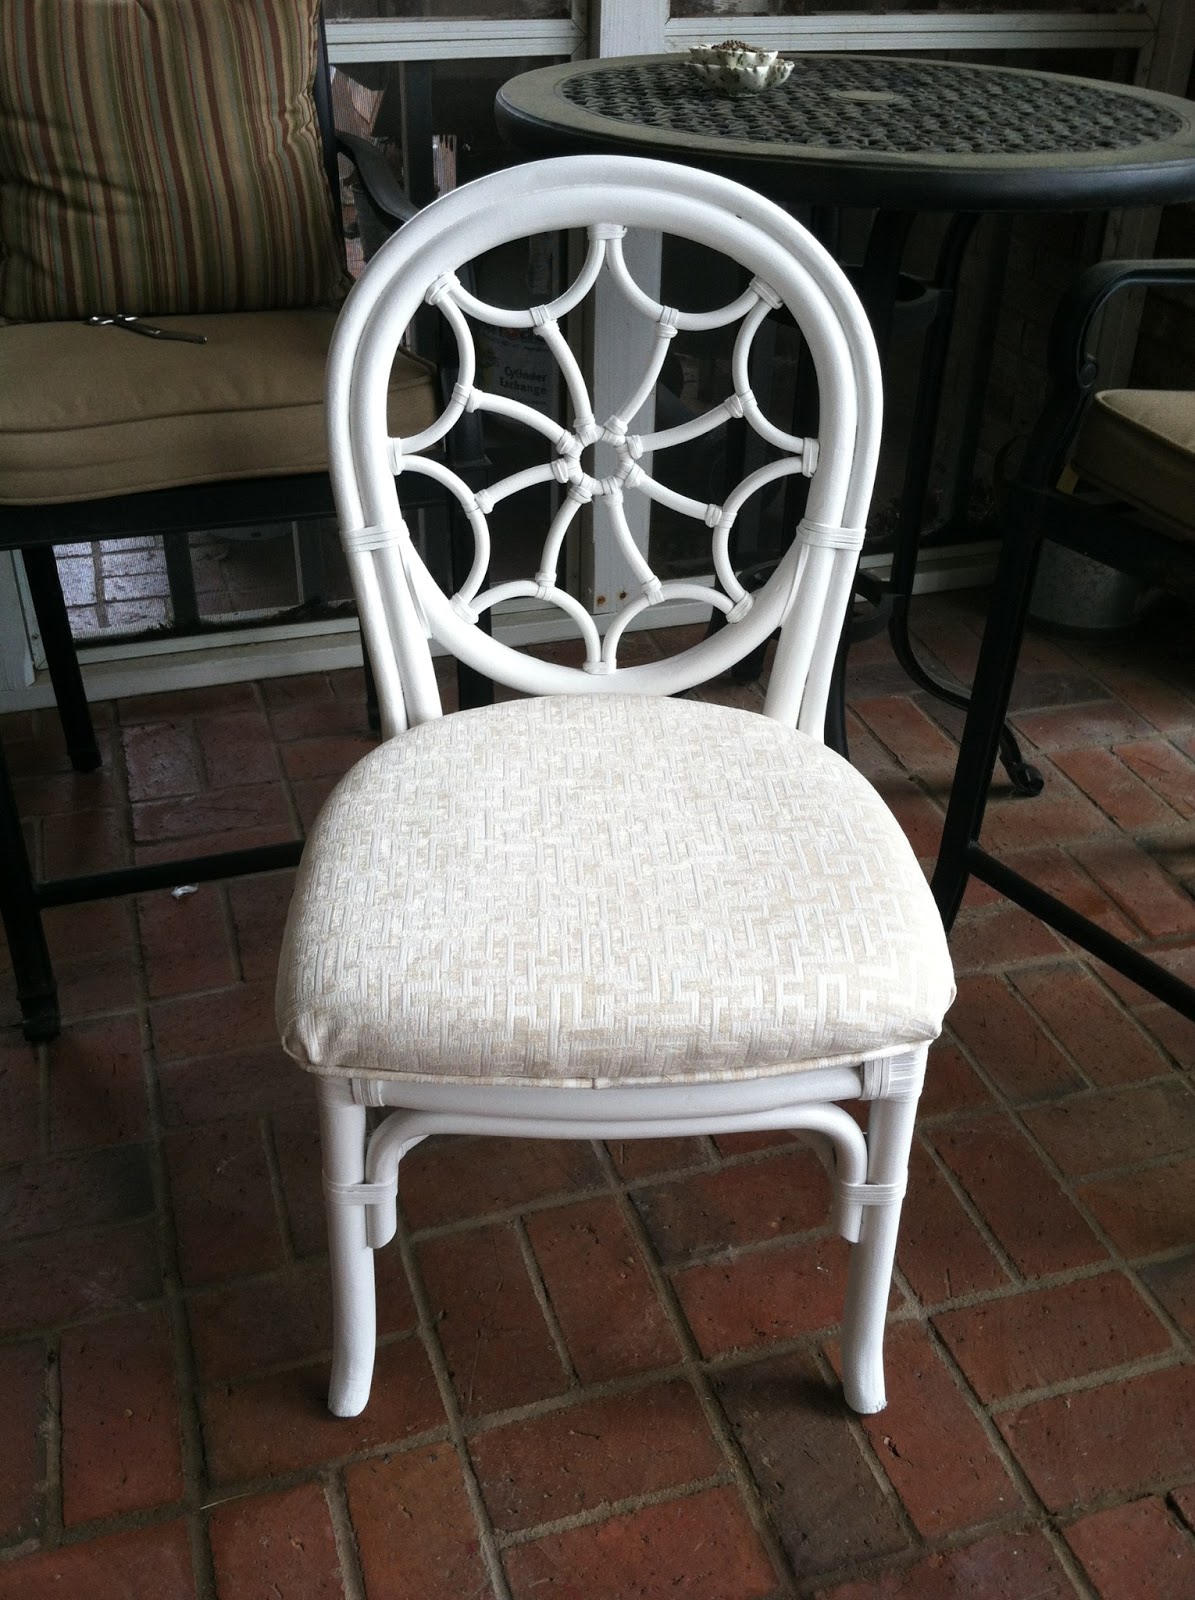
Then I went to a used furniture store here in Cordele. The owner goes to sales when a hotel changes furniture and found these spider back chairs. Yes, the seat cover covered with plastic. These were $20 each.


I bought 4 ($100 dollars) and brought them home. We then spray painted them.


I recovered the seat with fabric I already had left over from recovering my dining room chairs. I found this at www.lsfabric.com.


Table top. We found the white plates at Wal-Mart, flower plates at www.anthropologie.com, the silverware at www.target.com, the place mats at www.beallsoutlet.com, glasses at www.pier1.com, and the vases at www. TJMaxx.com.

The rug at www.rugsusa.com and the painting at www.overstock.com. All together we have about $600 invested in total.

BTW the napkins were a wedding gift of mine 29 years ago. Becca loved it!!!!!

Happy Reclaiming!

Monday, July 22, 2013

Reclaiming the Bed Risers

I love an elevated bed. I think it looks more elegant but the biggest reason is storage. This is where I store luggage. It's so easy to reach under the bed, grab the luggage, throw it on the bed and start packing.

I don't like bed risers. They are so ugly, stick out (where we all stump our toes), and look cheap. I recently bought an new bed frame. It was standard height and we had an elevated rice bed before and we felt we were laying on the floor. Even my husband said he felt he was in the wrong house.

I bought the standard bed risers from Wal-Mart.


I hated the look and the way they were visible and stuck out under the bed skirt. It cheapened the look I was going for. I got online to find something else but couldn't find anything that looked like a furniture leg.

I went to Home Depot. The furniture feet in their millwork section were not tall enough. I went to the deck section and found a post topper that was the right height. If I turned it upside down, it was perfect. One hitch: How do I make it work. Well I presented the problem to my husband. As always, if it can be done, he will find a way. And he did. I am posting how to make your bed risers look like furniture legs for as little as $15.

First we started with the feet that came with the frame:


Then he added a piece of wood on the inside and drilled a hole in it to match the screw on the deck post topper:


This is the deck post topper:


You can find it at Home Depot http://www.homedepot.com/p/WeatherShield-4-in-x-4-in-Pressure-Treated-Unfinished-Pine-Ball-Top-Finial-102615/100051746#.Ue29rLzD-Cg for $3.27 each.

We screwed them in an thought it was still not stable enough so he screwed in 4 more screws from the top:


 Then, I painted them to match my other furniture and installed them:


Now look at my finished product:


Exactly what I wanted. I am finishing the bedroom and will post more pictures later.

Happy Reclaiming!